Summary
There may be a need to eventually add DentalWriter to a new workstation added to company. Provided are the steps to do so.
DentalWriter Offers the option to download most recent version from an existing installation of DentalWriter on another workstation. Or may acquire the install file from the Nierman Share folder on the server and your network. (DentalWriter Technical Support Team will typically place there if any previous support effort took place or assisted with originating setup)
Download new workstation setup file from another workstation or server.
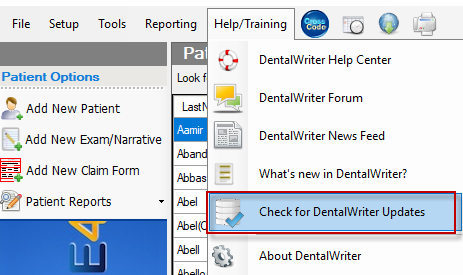
• From the Menu bar on DentalWriter select Help/Menu button.
Help/Menu
• From within Drop-down menu select Check for DentalWriter Updates.

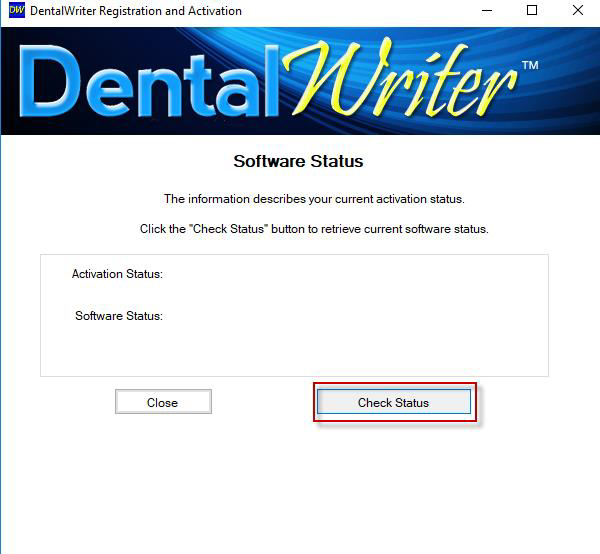
• Software status dialogue will load and open, select Check Status Button.

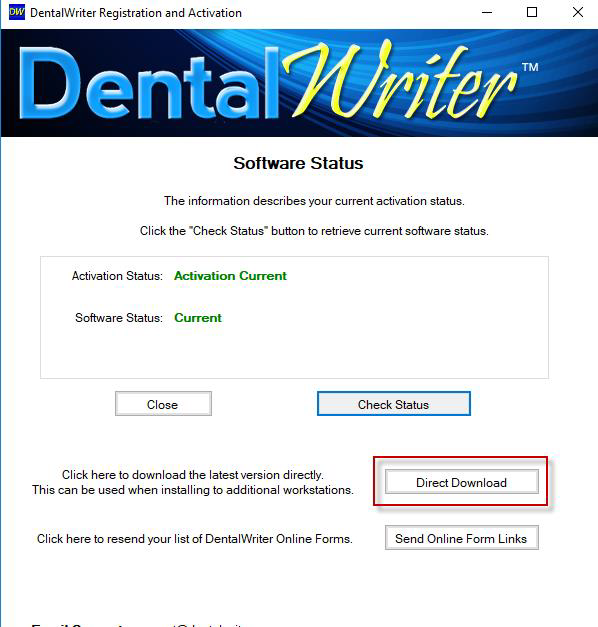
• The Software Status dialogue will refresh and will now present option to Direct Download. Select the Direct Download Button.
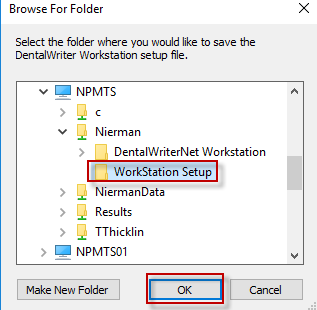
• A Windows Explore dialogue box will open prompting for save location. (It is recommended to save to a “Shared” location on the Server so it can be accessed to add additional workstations should the need require. This will also save you from downloading multiple times for every workstation addition. If not sure where on network to save, choose current machine and use a thumb drive or external hard drive to copy file to.
• Once the download completes, it’s now time to time to install on an additional Workstation. From the “System Tray” at the bottom of your workstation, double click and open with Windows Explore Folder.

• Navigate using Windows explorer window to the location where file was downloaded and saved. Once located, Left-click to highlight the file, then Right-Click file and select Run As Administrator.
Left-clickRight-Click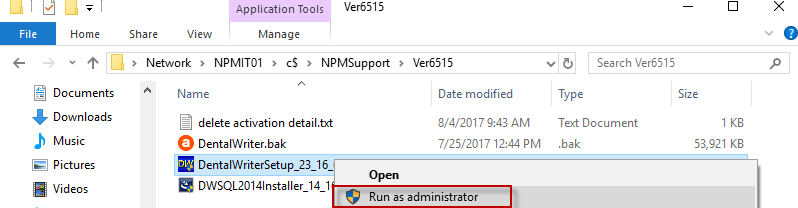
• The install will launch and begin installation. Since only a workstation setup, select all defaults, IE, Next, I agree, Next, Next, until complete. Workstation installs will not require any custom installations and by selecting all defaults will accomplish the install successfully.
Acquiring the setup file from the Nierman Share folder on the DentalWriter Server.
• Determine DentalWriter Server and where to locate the Workstation install file. Open DentalWriter from any workstation currently running DentalWriter. From the Menu Bar select Help/Training Button.

• Select About DentalWriter Button.

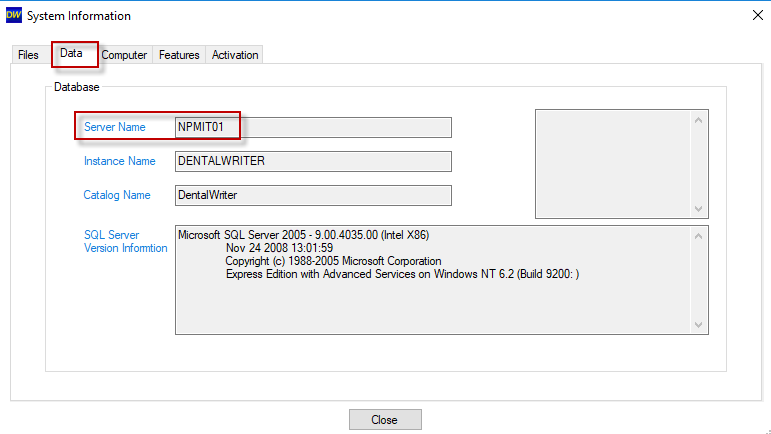
• A System Information Dialogue window will open. Select the Data Tab. You will be presented with the DentalWriter Server name and can begin search for install file located there using again Windows Explore folder from system tray of workstation.
• From the “System Tray” at the bottom of your workstation, double click and open with Windows Explore Folder.

• Navigate to the DentalWriter Server Name listed in the left side Windows Explore and select the Server. Or if downloaded to a Thumb Drive and saved locate it and open.
• If on Network, open Double-Click and open Nierman Share Folder.
• Double-Click and open Workstation Setup File Folder.
• Left-Click File, then Right-Click and select Run As Administrator.
• The install will launch and begin installation. Since only a workstation setup, select all defaults, IE, Next, I agree, Next, Next, until complete. Workstation installs will not require any custom installations and by selecting all defaults will accomplish the install successfully.
