Attaching Graphics/Images in a Visit
Adding images to a patient chart
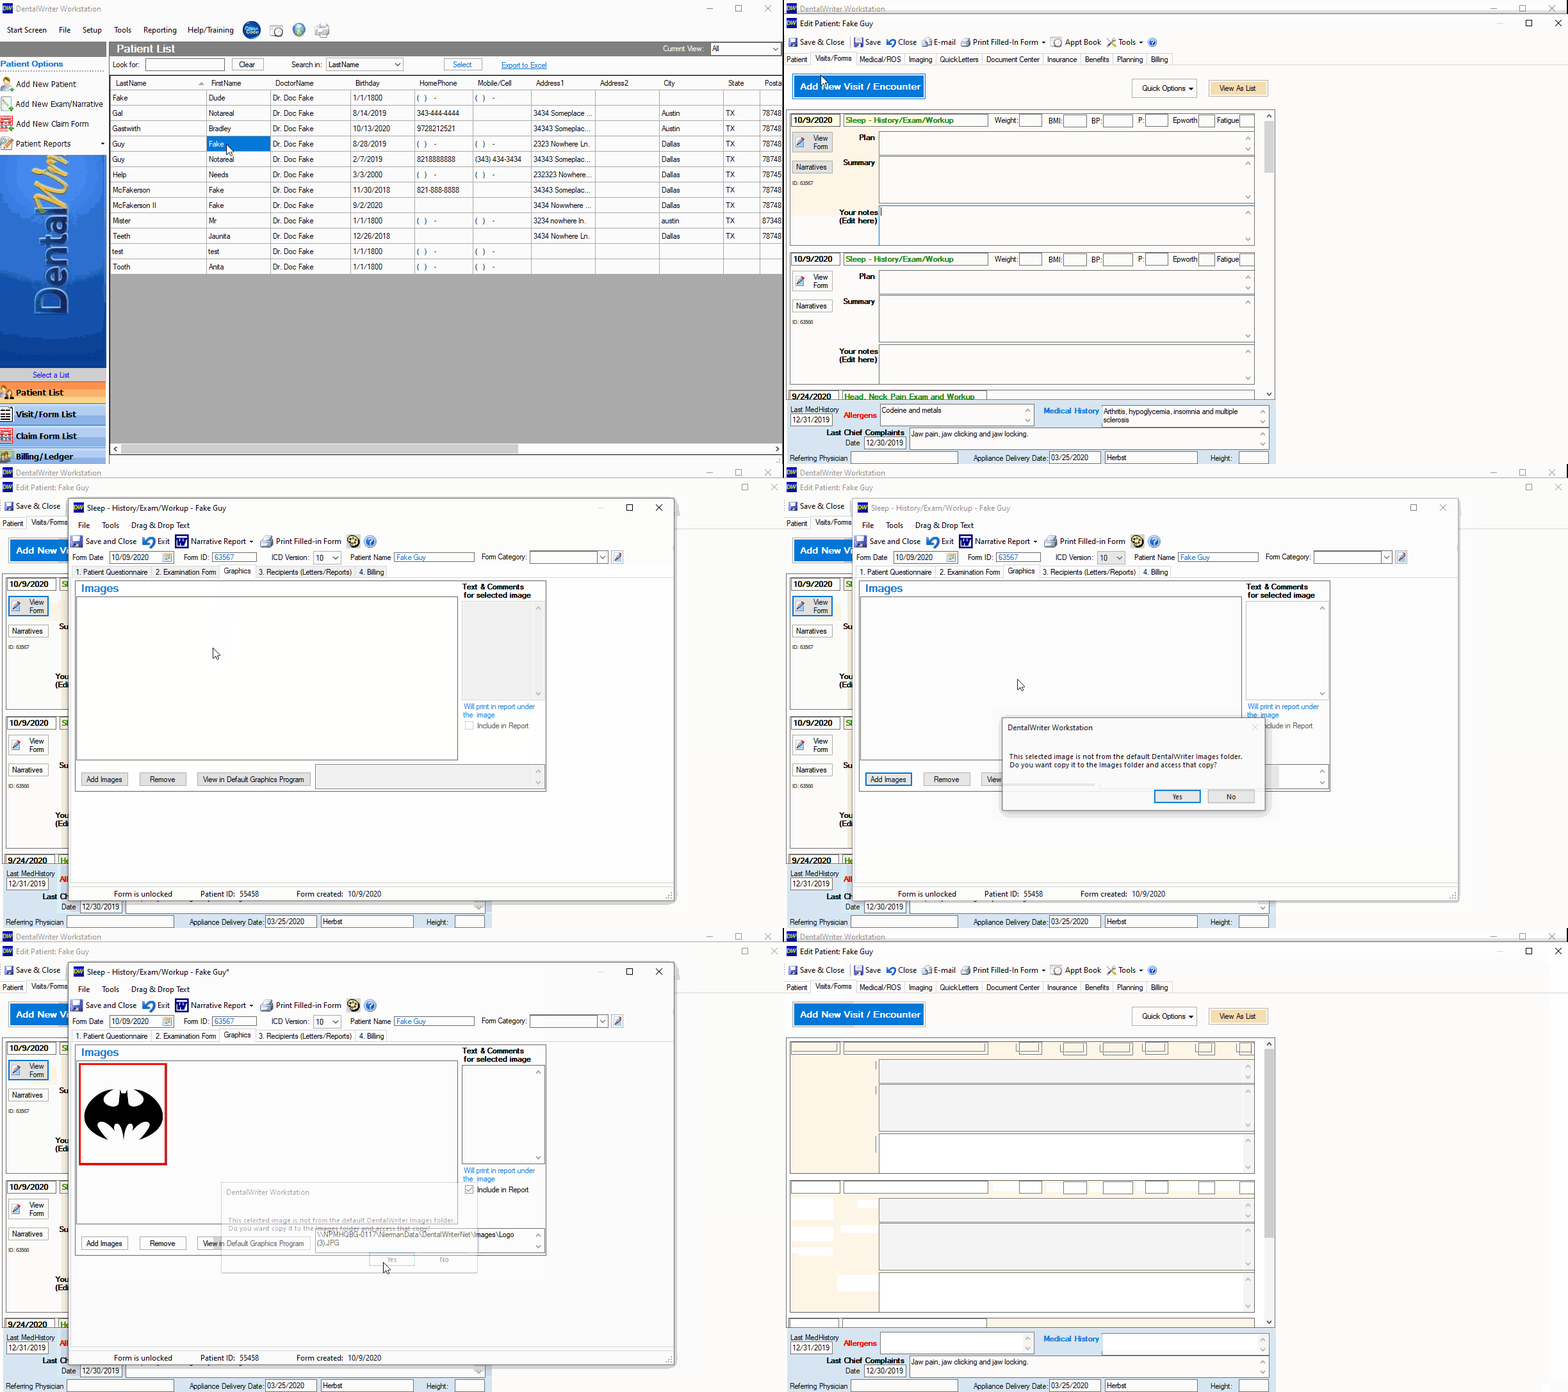
Step 1: Navigate to a patient chart from the patient list. Double click on the selected patient name that you’d like to add a Graphic image to in a visit.
Step 2: Once in the patient chart, navigate to the “Visits/Forms” tab and either create a new visit by selecting “Add New Visit/Encounter” or select the icon, “View Form” to open an existing visit.
Step 3: Navigate to the “Graphics” tab once in the visit. Select the icon, “Add Images”.
Step 4: In File (windows) explorer, find the image you’d like to attach on your PC. (E.G. Desktop/Scans/Downloads etc.) and select open or double click on the file.****NOTE: You may highlight multiple images (hold CTRL and select with the mouse) if you would like to bring multiple images in at once.
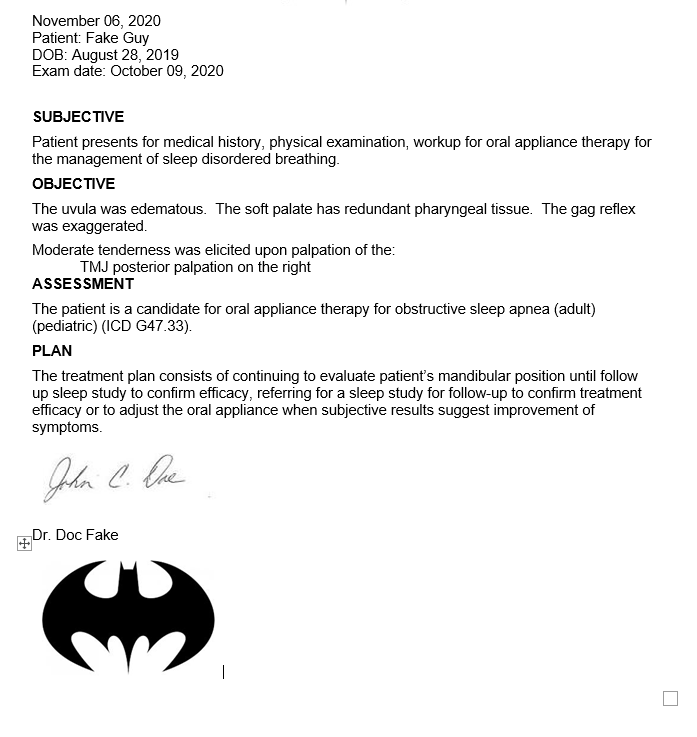
Step 5: You will receive a prompt about adding the image to the server folder. Select Yes so the file will be accessible from any computer or Workstation that has DentalWriter installed on it.Step 6: You may now add any text or comments to the image and by default the image or images will be included at the bottom of your narrative report.

This is how the image or images will appear on your narrative report when generated out of a visit.
