Nierman Medical Billing Service Flow (step by step)
How to submit requests to Nierman Practice Management's medical billing department
For any patient (no matter whether sleep, TMD, oral surgery, or something else), the first step is always benefit verification. The benefit verification is extremely important because it will determine what the next step is (i.e. pre-auth required? gap request needed? coinsurance? deductible high or met?)
Step 1: Request a benefit verification
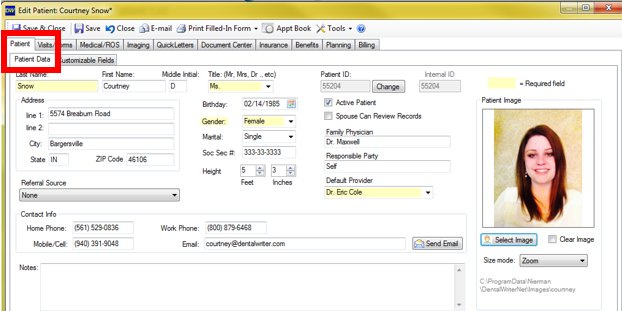
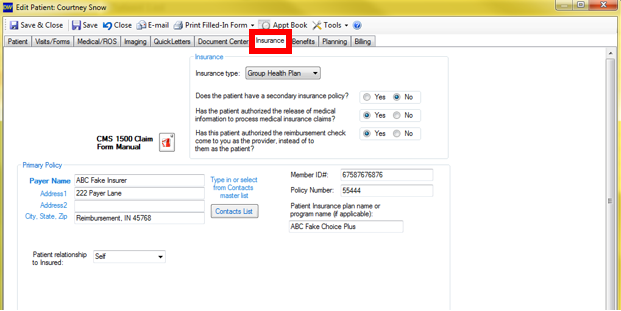
Start by opening any patient chart in DentalWriter. There are 2 screens that need to be completed prior to requesting a benefit verification:
1: The "Patient Data" sub-tab in the "Patient tab:
2: The "Insurance" tab:
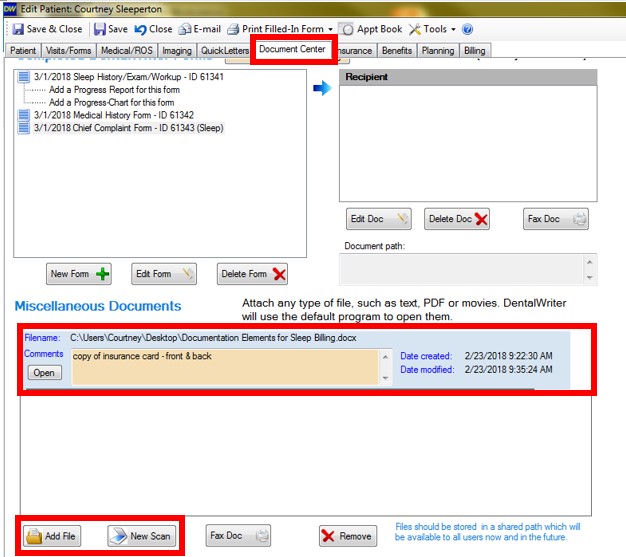
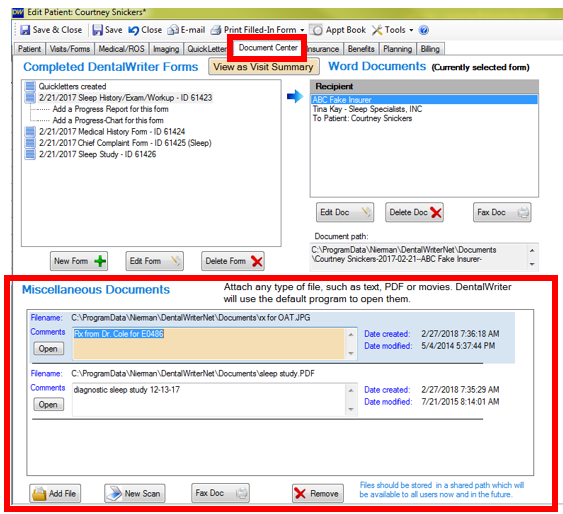
Please also be sure to scan a copy of the patient's insurance card, front and back, into the "Document Center" tab, in the "Miscellaneous Documents" section:
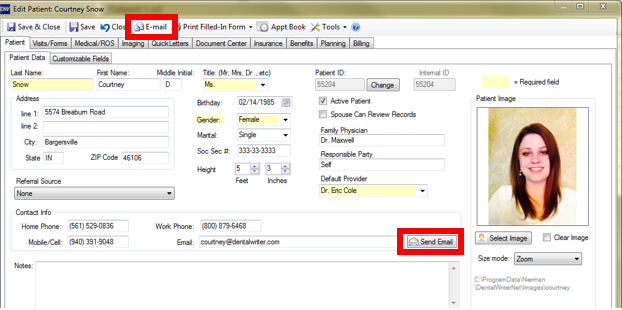
Once the information is completed in the 2 tabs above, click the "E-mail" button, located at the top of the patient chart, or on the "Patient Data" sub-tab next to the e-mail field:
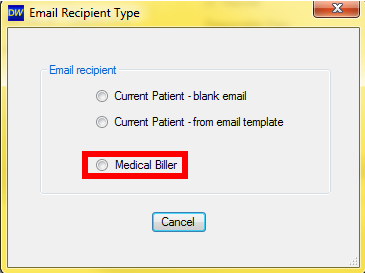
Select "Medical Biller":
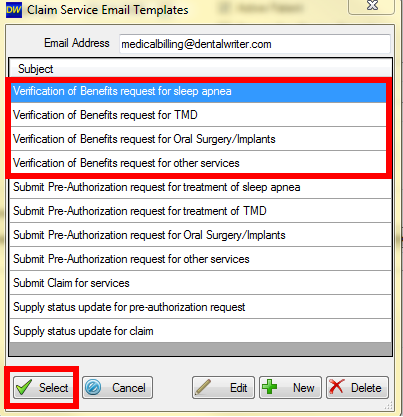
Click to highlight the verification of benefits type you want (sleep apnea, TMD, oral surgery/implants, or other), then click "Select":
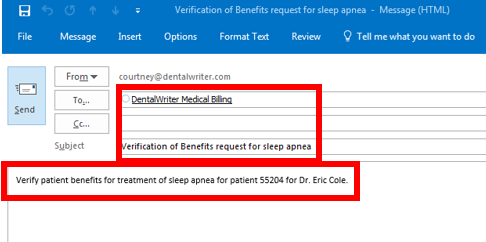
An e-mail will open in Outlook automatically addressed to deliver to the NPM Medical Billing Service queue, with a subject line and your request (including your patient's internal DentalWriter ID number and your doctor's name). You can type any additional notes if needed, then click "Send":
Your medical billing specialist will return your verification of benefits breakdown within 2 business days.
Step 2: Pre-authorization if required, and/or gap exception if needed/wanted
To submit a pre-authorization and/or gap exception request, your medical billing specialist will generally need a bit more info than what was needed for the benefit verification. This will generally include the patient's health history and treatment specific questionnaire (i.e. for sleep, Epworth sleepiness scale, for TMD).
In addition to the information listed in step 1, additional information that may be needed to complete a pre-authorization and/or gap exception request includes:
1. Scanned document in the "Document Center"
Scanned documents such as: copy of the medical insurance card, copy of sleep study report (for sleep) copy of prescription or referral from physician, report from ER (for accident cases), copy of x-ray (for surgery cases), etc. The document center is found is any patient chart in the tab labeled "Document Center":
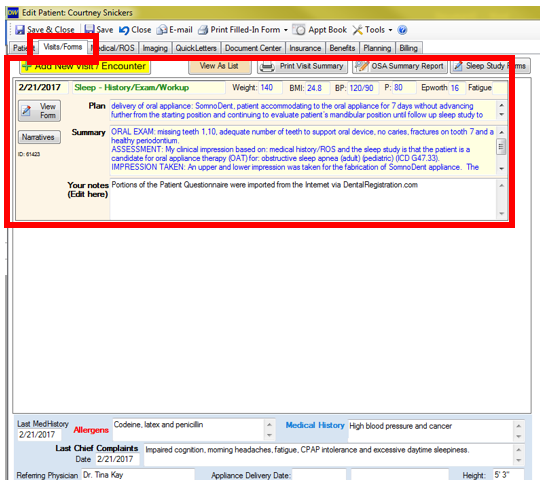
2. A health history questionnaire (required for most cases), and an exam may be needed for some cases (i.e. in order to pre-authorize for TMD services, a TMD diagnosis must first be established through your dentist's exam). The questionnaires and exams are found in any patient chart in the tab labeled "Visits/Forms". Click the yellow button to add a new visit, or click the "View Form" button underneath the date of a visit to open that visit and complete or edit the questionnaire and/or exam:
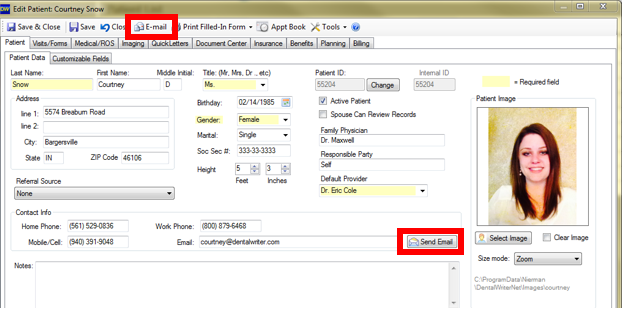
Once any applicable information is completed in the visit/form and scanned into the document center, click the "E-mail" button, located at the top of the patient chart, or on the "Patient Data" sub-tab next to the e-mail field:
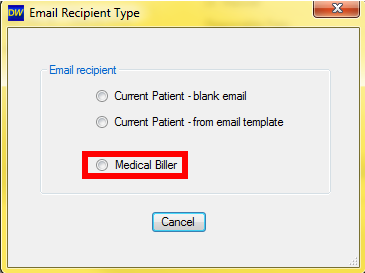
Select "Medical Biller":
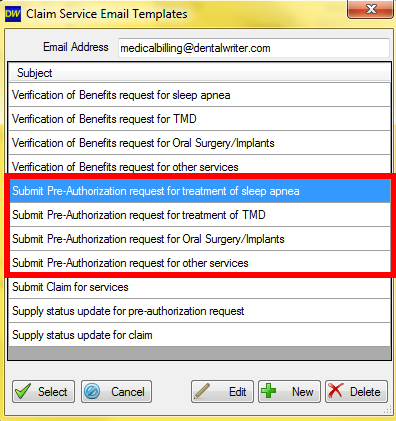
Click to highlight the pre-authorization type you want (sleep apnea, TMD, oral surgery/implants, or other), then click "Select":
An e-mail will open in Outlook automatically addressed to deliver to the Crosscode Billing Service queue, with a subject line and your request (including your patient's internal DentalWriter ID number and your doctor's name). You can type any additional notes if needed, then click "Send":
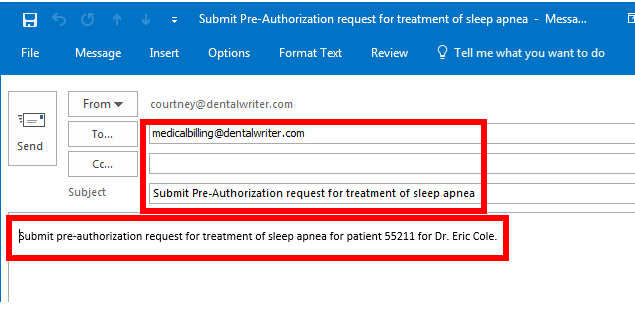
Your account manager will submit your pre-authorization and/or gap exception request with 2 business days. Turn around time for response from the medical insurer varies, but generally will be between a few days up to 30 days. Your account manager will update you on the progress.
Step 3: File claim for services
In order to file a medical claim for services, in addition to the information in Step 1 & 2. we will need a completed exam/visit. Entering all applicable clinical information is important from a documentation standpoint so your account manager has a strong narrative report to use as supporting documentation for your claim if needed.
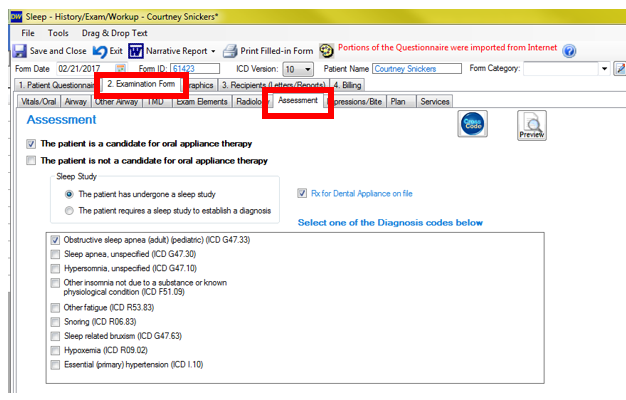
When accessing a visit/form, ensure that all applicable information is entered into the "Patient Questionnaire" and "Examination Form" tabs (and their sub-tabs), paying special attention to 2 sub-tabs in the "Examination Form" tab: the "Assessment" sub-tab and the "Services" sub-tab:
1. The "Assessment" sub-tab - the screen will look different depending on what type of patient it is (sleep, TMD, oral surgery), but at least 1 diagnosis code is required for every medical claim:
2. The "Services" sub-tab - the screen will look different depending on what type of patient it is (sleep, TMD, oral surgery), but at least 1 procedure code is required for every medical claim.....basically, mark off everything you want to bill for this day! (i.e. xrays, office visits, injections, appliances, etc):
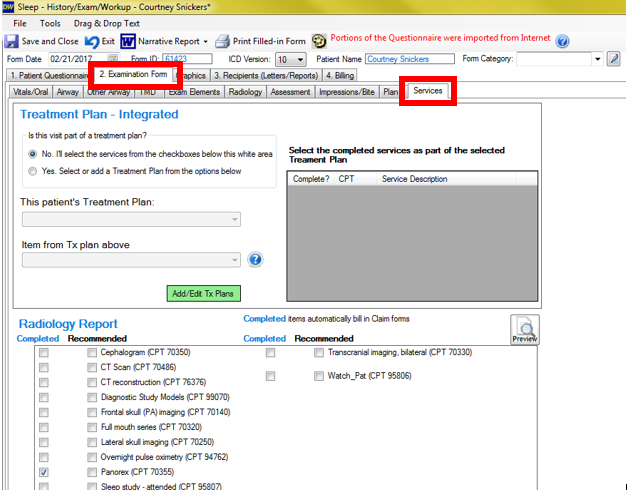
You can double check what all services are marked off for a particular date of service and the fee you have set for it prior to sending your request for claim filing to your account manager in the Ledger. This is located in the "Billing" tab of any visit/form (also in the main patient chart), in the "Ledger" sub-tab (click refresh if you have recently added a service):

***Note: if the tab is labeled "Claims" instead of "Billing" and there is no ledger visible, enable your ledger by going to the main screen of DW where you see your patient list, choose: Setup --> Configuration Options --> Ledger tab, then click the "Show and Use ledger in DentalWriter" checkbox. Save and close the window, and DentalWriter will restart.
Once any applicable information is completed in the visit/form and scanned into the document center, click the "E-mail" button, located at the top of the patient chart, or on the "Patient Data" sub-tab next to the e-mail field:
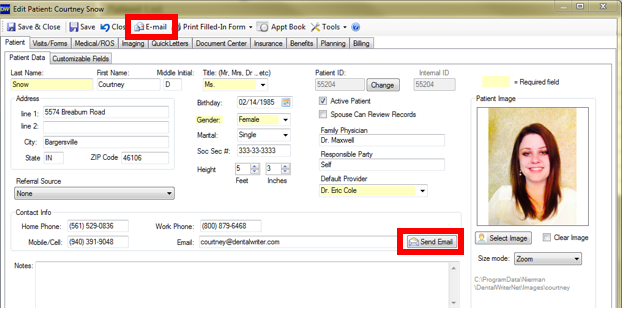
Select "Medical Biller":

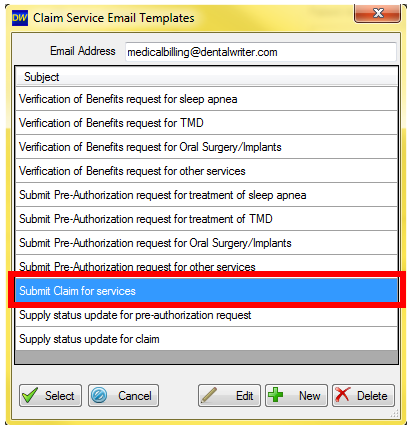
Click to highlight the "Submit claim for services" option, then click "Select":
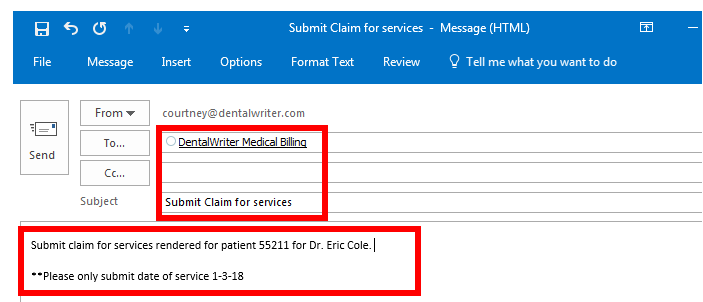
An e-mail will open in Outlook automatically addressed to deliver to the Crosscode Billing Service queue, with a subject line and your request (including your patient's internal DentalWriter ID number and your doctor's name). You can type any additional notes if needed, then click "Send":
Your account manager will submit your claim with 2 business days. Turn around time for response and/or payment from the medical insurer varies, but generally will be between a 2-8 weeks. Your account manager will update you on the progress.
Important notes:
- The e-mail address that submits the request to the Billing Service queue is automatically added as a "follower" to that ticket, meaning that e-mail address will receive notification e-mails when updates are made the ticket.
- You do not need to submit more than 1 e-mail per request. If you need to provide additional information for an existing request, you can scan it into your patient chart and let your medical biller know it is there (by replying to a notification e-mail for that request).
- Keep in mind, we do not automatically file pre-authorization and/or gap exception requests after a benefit verification, it does need to be requested as some patient may not move forward after being presented their benefit verification information, so we will await your request to perform those tasks.
- Scanning a copy of the patient's medical insurance card into their chart is very helpful!