Step 1: From the patient list, select a patient chart that you'd like to customize.
Step 2: Navigate to the "visits/forms" tab and either select "Add New Visit/Encounter" to create a new visit type that you would like to customize or select "view form" to customize an existing form that was previously created.
Step 3: When in the patient visit/form, it is possible to customize certain sections/questions/controls. To enable the customization feature in any visit/form, select the “Tools” dropdown, “customize items in Form Sections".
Step 4: You will then get a prompt enabling the “customize” Icon. Click “OK”.
Step 5: Now you will see the “Customize” icon throughout the visit in every form section (questionnaire/exam). Select the “Customize” Icon for the section that you would like to add to, remove from, or change.
Step 6: You will now have access to customize the section you are in (this example shows the sleep/oral examination section from the exam). You can only change one line at a time. You may highlight the control type or question and select “Edit item” to change the existing information, remove, or “New item”.
For example, you can highlight the line item and select “Edit item”.
“Step 1” This is where you will select the type of control to either edit or add. Note that different form sections have different "control types". Some sections are more limited to what types of controls can be added like the palpation section or the chief complaints section. Other sections, like the one listed below, allows for multiple types of controls or question types to be added.
“Step 2” This allows you to label the control type or question. This is how it will look on the actual exam/questionnaire depending on what section you are making the customization.
“Step 3” is how the text will read on your narrative reports.
***Note that some control types like user defined dropdowns or like numeric textbox options requires that you type in a left and right carrot “<>” and the word “text” or “number” under “Step 3”. This example shows “<text>” which should be manually typed in to a new control/question after the label. This means that whatever the user/patient puts into the field will show up on the narrative report and in the exam/questionnaire. There is a”Textbox/Dropdown Options” instructions you will see as well for the aforementioned control types.
Select “Finish” to complete the addition.
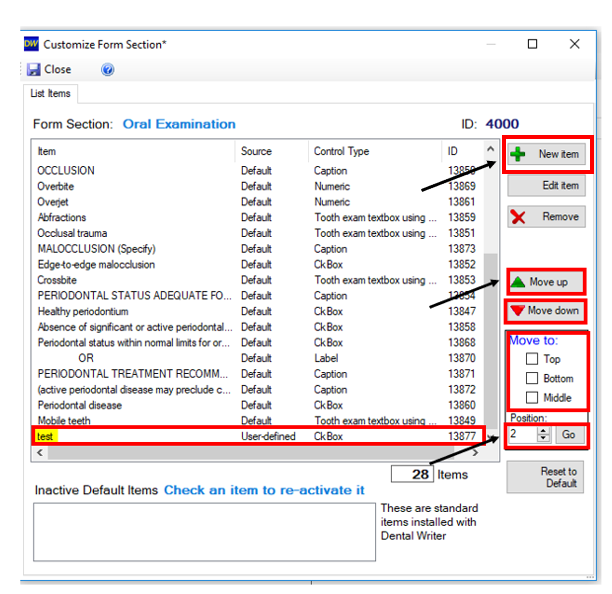
Step 7: You can also select “New Item” to add a control or question to a section. Again, you will have access to different control types or questions that are available for the section you are attempting to customize. You will then follow the steps from the example in "Edit item" from above.
Step 8: Select “Close” to see all of your changes.
Step 9: The last step is to run a synch to push any changes made to the patient questionnaire section out to the online forms. Once the process completes, it will close on it's own and the changes will now be pushed out to the online forms as well as in your Dental Writer Software.
***Note: Some sections you will have the option “Change the height of this section” which allows for adding or removing the number of pixels to affect the columns in that particular section.
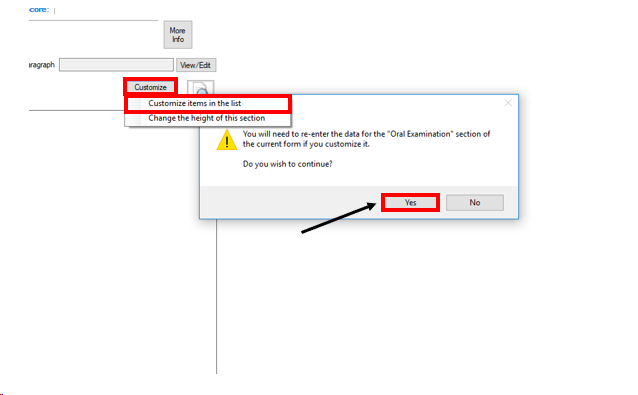
You may also receive a prompt letting you know that the information that was entered into the section you are attempting to customize will be removed, hence utilizing a test or fake patient in your DentalWriter Software. You should select “Yes” to move forward.
***NOTE: You can move the new or existing controls up or down in the list for the section you are working in by selecting the arrow icons, or actually typing in the line “position” number and selecting “Go”.
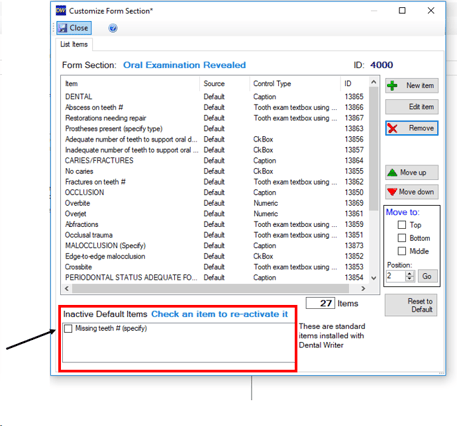
****Note: If you ever remove a default control, it will go into the “Inactive Default Items”. You can always select it back to bring it back in or select “Reset to Default” to bring it back to its original format, but this would remove every customization for that section.