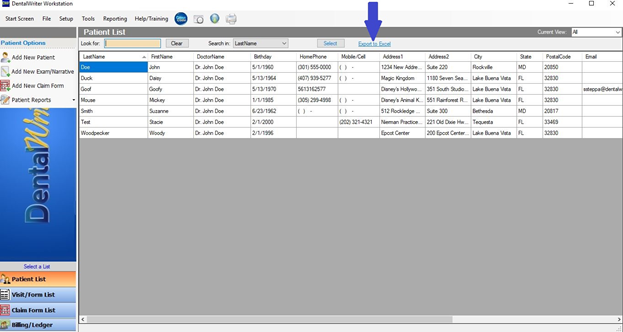
Export patient list to Excel. Name that document and save it to your computer.

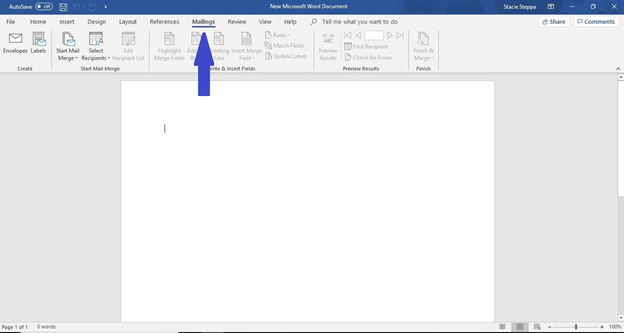
Open a new blank document in Microsoft Word.
Click on Mailings at the top and center of the page.
FOR LABELS:
Click on Start Mail Merge, and then in the drop-down list click on Labels. When the dialog box opens, choose your label vendor, and then the product #. Click OK. The labels will then be formatted automatically on your page.
FOR ENVELOPES:
Click on Start Mail Merge, and then in the dialog box that opens, choose envelope size and check printing options for your printer feed method you will use for your envelopes. Select, and click OK. Your envelopes will then be formatted automatically on your page. You may add return address at top left of envelope template if you are not using pre-printed envelopes at this time. Double click in center of envelope template to reveal address box.
Click on Start Mail Merge, and then in the dialog box that opens, choose envelope size and check printing options for your printer feed method you will use for your envelopes. Select, and click OK. Your envelopes will then be formatted automatically on your page. You may add return address at top left of envelope template if you are not using pre-printed envelopes at this time. Double click in center of envelope template to reveal address box.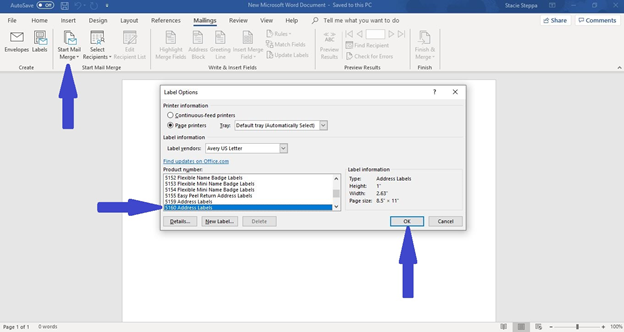
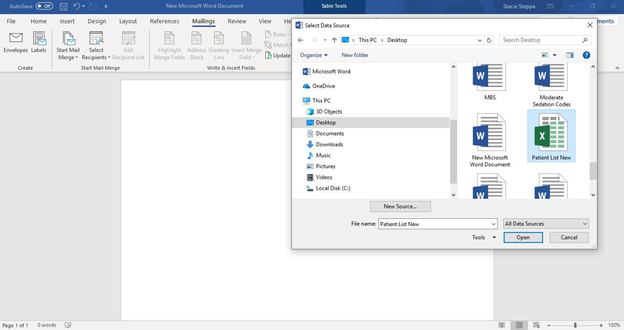
Click on Select Recipients. Highlight Existing List, and click. Click on the saved Excel document with your patients’ information. Click Open. Once again, click on selected Excel Document, and click OK.
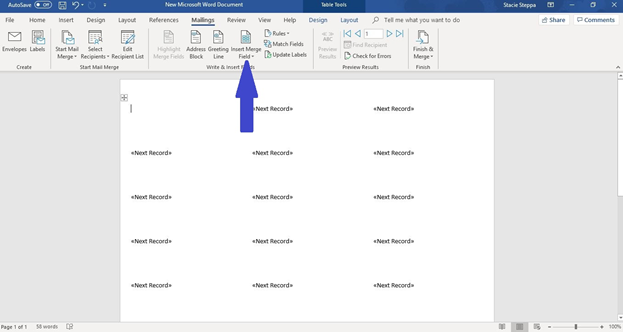
Click on Insert Merge Fields. Add First Name – space – Last Name, and on next line, add Address 1, and on next line, add Address 2 (in case of Suite numbers, etc), on next line, add City – comma – space – State – space – Postal Code (or zip code). Add those just as you would like them to appear on the label. Then format your label in the desired font and size.
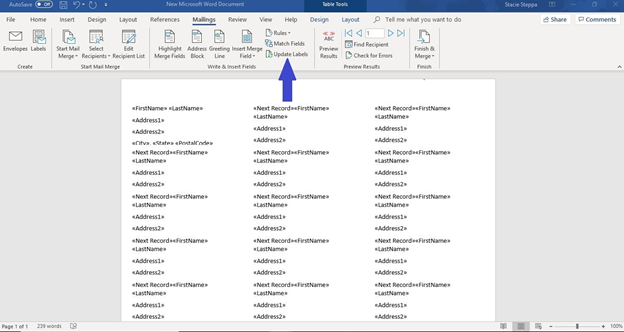
Click Update Labels or for Envelopes, skip this step and proceed to next step.
Click Preview Results.
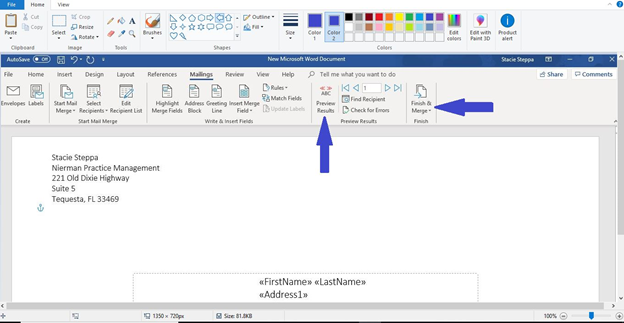
Click Finish & Merge. Then click Edit Individual Documents. Click All. Click OK.

Save the Label Template / Envelope Template for future use. Next time you use the template, if you have made additions or corrections to your patient list, make sure to choose your updated Excel document in the Select Recipients tab for your new labels and/or envelopes.